Showing posts with label Blog Hopping. Show all posts

Sunday, November 13, 2011

30 Days of Handmade Gift Giving Blog Hop ~ Day 13


Today is the 13th day of Handmade Gift Giving! 


Today is me again. I sure hope you aren't getting tired of me! I do have 6 more days throughout the month. But we have 11 other wonderful, talented Ladies still too throughout the month! I am excited to see what they are going to do too, as I don't know either :)


As I said yesterday to day is more candles, as I split my post to cover yesterday's last minute cancellation.
Today I did little voitive candles. Not the tea lights but the ones that are about 1.5" to 3" tall and about 1" to 2" round.  These too are easy and some are quick some take a little more patience and time. 

I again used the flameless candles. I bought the packages from Costco where they had tealights and voitives together.  While I love scented candles and burning those, Iunless they are in a glass container, I can't alter them and burn them. I have this beautiful candle, my friend gave my husband and I for our wedding and we burned it just a little but then it got to the point where it was carved it would be ruined and because we love both my friend, the candle, and its a gift from her on a special day we don't burn it anymore.  I love the flameless cause I can burn (turn them on) and still get the beauty of both the altered candle and the light effect too. On top of that its less of a fire hazard, so long as the battery isn't corroded.

The first ones I did, I used my CTMH Card Commentary word Stamps. I used a pigment based ink, as it will stick better than a water base on the candles. Even though they are flameless candles they still have the "wax" as a real candle. So I rolled the candle very slowly, as the candle will slide if you go too fast, over the stamp.  I then added embossing powder over the candle, using a small tipped paint brush  to brush away any extra emboss powder there was around the words.  Then very very carefully used my heat gun, held at a good distance away, heated the emboss powder to the melting point without melting the wax on the candle too much.

Stamped with silver pigment ink

embossed with silver emboss powder and rhinestones added for extra glam!


 Wish, Love, Dream Stamped and embossed in silver with rhinestones added for extra glam!

Wish, Love, Dream Stamped and embossed in Gold with rhinestones added for extra glam!


 Votive Candles, CTMH Markers to ink the edges of the adhesive backed paper lace.

Paper lace inked edge in Sky blue, the flowers inked in pink with blue rhinestones


The Paper lace is inked in green with cranberry grossgrain ribbon and a plastic Gold bow in the middle

 The Paper lace is inked in green with cranberry grossgrain ribbon and a plastic Gold bow in the middle


 The Votive candle is lit. The Paper lace is inked in green with cranberry grossgrain ribbon and a plastic Green bow in the middle. 

 The Paper lace is inked in green with cranberry grossgrain ribbon and a plastic Green bow in the middle

 The Paper lace is inked in green with a plastic Red bow in the middle


The Paper lace is inked in green with a plastic Green bow in the middle.

Please be kind and leave some love for Gifts for inspiration and writing up tutorials/instructions. Check out their blogs if you've got time too.

If your just Joining us here is the Past Days of The Hop! It's one Blog a day for 30 Days of Gift making Ideas and projects!


Simply Click their names to go to their blogs

Day  1 ~ The Scrapoholic ~ Countdown Calendar 
Day  2 ~ Jessica The Creative Stamper ~ Wreath
Day  3 ~ Debbie DD's Crafts ~ Notepad
Day  4 ~ Sarah Pink Cricut ~ Scarf
Day  5 ~ The Scrapoholic ~ Alterted Paper Mache Book
Day  6 ~ Crafty Queen ~ Calendar
Day  7 ~ Playing with Paper ~ Candle
Day  8 ~ The Scrapoholic ~ Recycled Jars/Containers
Day  9 ~ The Scrapoholic ~ Altered Clipboard
Day 10 ~ Thatz Uneek ~ Altered File Album
Day 11 ~ Kinderstampo ~ table setting 
Day 12 ~ The Scrapoholic ~ Candle

Don't Forget to check out my 30 Days of Christmas Cards too. 
Today's isn't posted yet, will be posted in just a little bit


Until Tommorrow...
Happy Crafting!
TTFN Jill (aka The Scrapoholic)


Saturday, November 12, 2011

30 Days of Handmade Gift Giving Blog Hop ~ Day 12


 Today is the twelfth day of the Handmade Gift Giving Hop! I sure hope you are enjoying it and getting some wonderful ideas! I know I sure am!

I apologize for today's going up late. Someone else was supposed to be up today and I am not sure but got an email this morning they weren't doing it. I had plans with my family today to spend some time together and didn't have time to grab another post or do a quick one up this morning with such late notice.

Today, I am going to share a simple project that can be either a gift or even for yourself. It a Home Decor, an altered candle. I split my post for tomorrow for today and I'll have more tomorrow. Today's is quick n easy can be made in less than 10 min.

First you need to get a Flameless candle or a real candle, as long as you don't plan on burning the candle. Then grab some pretty vellum, I used a clear with gold splats. Then you'll need about a yard of ribbon (I actually didn't measure mine), measuring about 1.5" to 2" wide preferably wired, but not required. You'll need an ink pad that coordinates, but not necessary.  


You will want to measure your piece of vellum and cut to fit around and from top to bottom. Then cut the vellum to the correct measurements. Then, if desired, ink the top and bottom edges of the vellum with your ink pad. 


Then you will want to apply your favorite adhesive to the entire piece of vellum. Then carefully wrap it around the candle. Rub it on so that its good and stuck. If you desire you can ink the top of the candle too.


then you will want to wrap a piece of your wired ribbon around the candle once and apply adhesive to keep it in place.


Then with the remaining ribbon you'll want to make a beautiful full bow. I made a 5 loop bow. I don't know how to explain how to make the bow, its one of those things i just know how to do by making 2 regular bows and then adding the middle (5th) loop at the end.


Then you will want to adhere the bow to the candle. I used glue dots as I found they were easiest to manipulate for the bow. I used two large ones for the middle, one for each loop in the back middle and one on each ribbon ends hanging.


 Once the ribbon is attached its done! Simple, easy, quick and yet beautiful.  I got my pack of flameless candles at Costco and these have a nice vanilla scent to them. But because these have no real flame when you turn them on they look beautiful. Its hard to see but the bottom 2 I have the candle turned on. The reason on this particular candle I suggest a flameless or not burning a regular candle is because of the paper and bow that is attached are flammable and we don't want to see anyone loose their house at this time of year or anytime of the year.  You don't necessarily have to make it Christmas or holiday themed. You can use any ribbon and make it match their decor.

Tomorrow, come back and I will show you some other wonderful ways to alter candles!
 

Please be kind and leave some love for Gifts for inspiration and writing up tutorials/instructions. Check out their blogs if you've got time too.

If your just Joining us here is the Past Days of The Hop! It's one Blog a day for 30 Days of Gift making Ideas and projects!


Simply Click their names to go to their blogs

Day  1 ~ The Scrapoholic ~ Countdown Calendar 
Day  2 ~ Jessica The Creative Stamper ~ Wreath
Day  3 ~ Debbie DD's Crafts ~ Notepad
Day  4 ~ Sarah Pink Cricut ~ Scarf
Day  5 ~ The Scrapoholic ~ Alterted Paper Mache Book
Day  6 ~ Crafty Queen ~ Calendar
Day  7 ~ Playing with Paper ~ Candle
Day  8 ~ The Scrapoholic ~ Recycled Jars/Containers
Day  9 ~ The Scrapoholic ~ Altered Clipboard
Day 10 ~ Thatz Uneek ~ Altered File Album

Don't Forget to check out my 30 Days of Christmas Cards too. 


Until Tommorrow...
Happy Crafting!
TTFN Jill (aka The Scrapoholic)

Friday, November 11, 2011

30 Days of Handmade Gift Giving Blog Hop ~ Day 11


Today is the 11th Day of Handmade Gift Giving Hop!
It's also, Veteran's Day here in the USA! I want to say thank you to all those who have served, are serving and those families who have stood by and supported and endured their family member while serving!
Also, yesterday was the 236th Birthday of the USMC! Semper Fi!


I sure hope you enjoyed yesterdays Gift Idea!
Today is a New Place to visit for Inspiration! 


Today You are going to visit Jess at KinderStampo


Photobucket

http://www.kinderstampo.com/

If for some reason her post isn't up check back later with time zones being different it could simply be that or bad weather and the power or internet is out.

Please be kind and leave some love for Gifts for inspiration and writing up tutorials/instructions. Check out their blogs if you've got time too.

If your just Joining us here is the Past Days of The Hop! It's one Blog a day for 30 Days of Gift making Ideas and projects!

Simply Click their names to go to their blogs

Day  1 ~ The Scrapoholic ~ Countdown Calendar 
Day  2 ~ Jessica The Creative Stamper ~ Wreath
Day  3 ~ Debbie DD's Crafts ~ Notepad
Day  4 ~ Sarah Pink Cricut ~ Scarf
Day  5 ~ The Scrapoholic ~ Alterted Paper Mache Book
Day  6 ~ Crafty Queen ~ Calendar
Day  7 ~ Playing with Paper ~ Candle
Day  8 ~ The Scrapoholic ~ Recycled Jars/Containers
Day  9 ~ The Scrapoholic ~ Altered Clipboard
Day 10 ~ Thatz Uneek ~ Altered File Album

Don't Forget to check out my 30 Days of Christmas Cards too. 

Also, Don't forget about contest for a chance to win my memories Digital software program. TODAY IS THE LAST DAY!
Check out the rules HERE 

Until Tommorrow...
Happy Crafting!
TTFN Jill (aka The Scrapoholic)

Thursday, November 10, 2011

30 Days of Handmade Gift Giving Blog Hop ~ Day 10

Today is the 10th Day of Handmade Gift Giving Hop!


I sure hope you enjoyed yesterdays Gift Idea!
Today is a New Place to visit for Inspiration! 

Today You are going to visit Jessica at That's Unique!


Please, Take some time and check out the project and maybe even my blog! Please be kind and leave some loving! 


If for some reason her post isn't up check back later with time zones being different it could simply be that or bad weather and the power or internet is out.


If your just Joining us here is the Past Days of The Hop! It's one Blog a day for 30 Days of Gift making Ideas and projects!

Simply Click their names to go to their blogs

Day  1 ~ The Scrapoholic ~ Countdown Calendar 
Day  2 ~ Jessica The Creative Stamper ~ Wreath
Day  3 ~ Debbie DD's Crafts ~ Notepad
Day  4 ~ Sarah Pink Cricut ~ Scarf
Day  5 ~ The Scrapoholic ~ Alterted Paper Mache Book
Day  6 ~ Crafty Queen ~ Calendar
Day  7 ~ Playing with Paper ~ Candle
Day  8 ~ The Scrapoholic ~ Recycled Jars/Containers
Day  9 ~ The Scrapoholic ~ Altered Clipboard

Don't Forget to check out my 30 Days of Christmas Cards too. 

Also, Don't forget about contest for a chance to win my memories Digital software program
Check out the rules HERE 

Until Tommorrow...
Happy Crafting!
TTFN Jill (aka The Scrapoholic)

Wednesday, November 9, 2011

30 Days of Handmade Gift Giving Blog Hop ~ Day 9


I sure hope you enjoyed yesterdays Gift Idea!

Today is another New Project/Gift for Inspiration! 

Today You are going to visit ME Again!

Yes, you'll be visiting me quite a few times this month.  I don't know about you but I love making gifts for people.  Everyone seems to enjoy them every year. Its something I've done since I was a kid, guess it has something to do with the fact we were poor and didn't have much money and everyone always seemed to love my gifts. This year is a very tight budget year. I'm just thankful my kids are old enough to understand it all and that Santa is flat broke and there won't be any presents from him this year :(  We do lots of traditions here at my house to teach the kids the true meaning of Christmas and to enjoy the true meaning of Christmas and to cherish the time we get to spend with family, thou this year it will be just my hubby, the 3 kids and myself.  We will still have a good time I'm sure.

Today, I'm going to share with you my altered clipboards. I have done several in the past and really just love making them and people find them very useful and love the designs I've made. 

They are really simple, what you will need is:

Clipboard (any size)
Paper to cover it
Maybe some scraps to embellish it a little
Embellishments (if desired)
Die Cuts (if desired)
Ribbon or String
Adhesive (all sorts depending items)
Trimmer or Scissors for cutting
Acrylic square or a piece of recycled clear plastic
I think thats it

You start with your clipboard, remove plastic wrap and/or any price stickers
My Clipboards I did today are 12.5" x 9"

Then cut/trim your paper to size to fit. or you could choose to paint it with acrylic paint if desired too. Add any string or ribbon as desired. If you wanted to use it as a regular clipboard you could leave it just like that and be done. However, the ones I made are meant to be hung up by a computer desk or somewhere in an office or home area like a memo board


Add Embellishments to the board and adhere them down with the proper glue
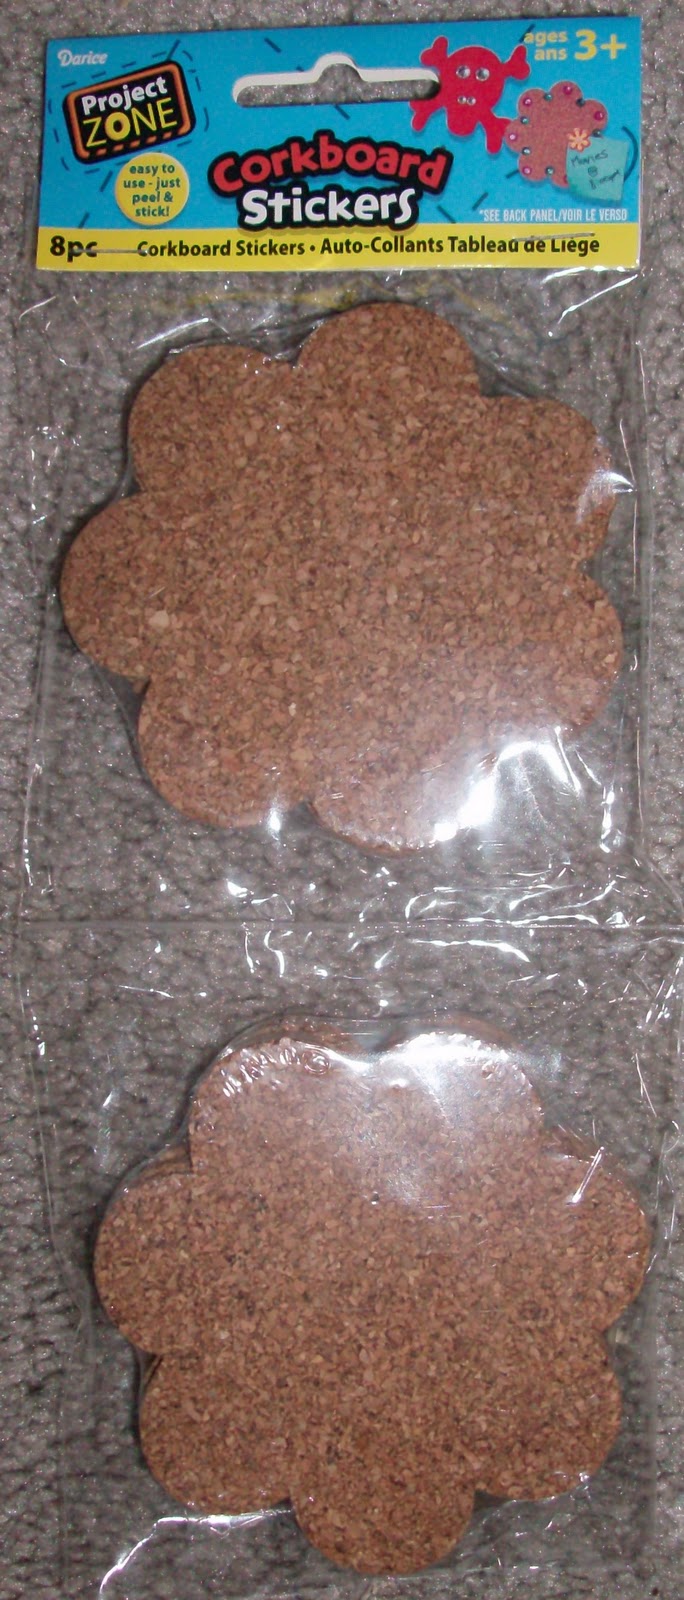
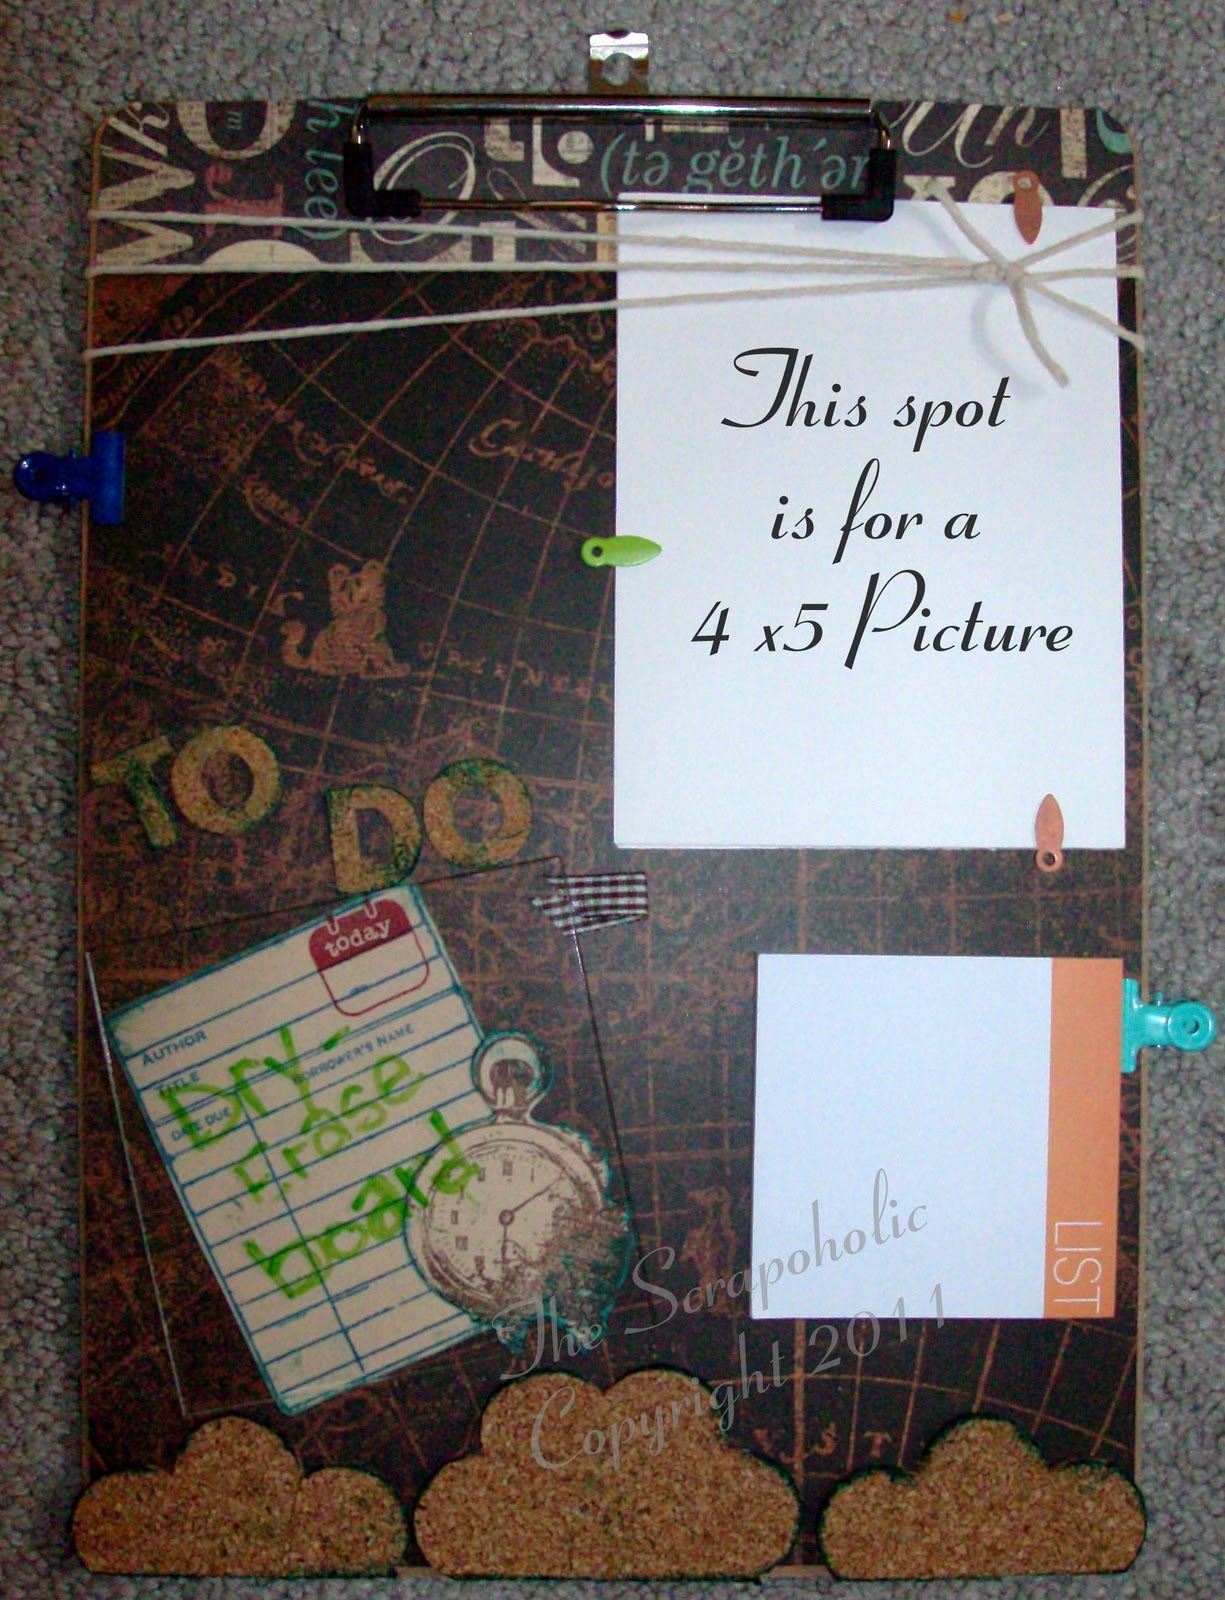
You can find these fun cork board or even chalkboard shapes at Michaels and they are self adhesive and they stick pretty good! I used these on both boards as you will see in the finished clipboards

I used a regular 4.25" x 5.5" envelop cut the flap off and adhered it down for notes. I used CTMH cork board letters which are self adhesive and can be colored with ink pads or markers. I added some ribbon to run across the bottom of the board and the top too.

I used a Hello Kitty Die Cut to embellish it in the upper right hand corner

To make a Dry Erase board I used a 4x4 Clear acrlic square that I got a long time ago at the Scrapbook convention. Lots of people use these to make those clear acrylic lil books. These squares also come in shapes and different sizes. there is usuaully a protective coating like you see in the picture, mine is blue and on both sides, simply peel off .

Once you have the protective coating peeled off, which they come off super easy kin of like color forms (if you remember those), then you'll want to cover the entire back of one side with your favorite type of  strong adhesive. then stick it on the clipboard where you'd like it. If you don't have these acrylic squares or shapes. You can use a flat piece of clear plastic from packaging such as a cricut cartridge or something like that, it works just as good.

This is my finished part of the erase board. I wrote Merry Christmas with an erase board marker
finish up with any other embellishments, like pearls, brads, ribbons, clips, die cuts, flowers, etc.
wahlaa! your done your clipboard!


What do you think? Something you might do?


If your just Joining us here is the Past Days of The Hop! It's one Blog a day for 30 Days of Gift making Ideas and projects!

Simply Click their names to go to their blogs

Day  1 ~ The Scrapoholic ~ Countdown Calendar 
Day  2 ~ Jessica The Creative Stamper ~ Wreath
Day  3 ~ Debbie DD's Crafts ~ Notepad
Day  4 ~ Sarah Pink Cricut ~ Scarf
Day  5 ~ The Scrapoholic ~ Alterted Paper Mache Book
Day  6 ~ Crafty Queen ~ Calendar
Day  7 ~ Playing with Paper ~ Candle
Day  8 ~ The Scrapoholic ~ Recycled Jars/Containers

Don't Forget to check out my 30 Days of Christmas Cards too. 

Also, Don't forget about contest for a chance to win my memories Digital software program
Check out the rules HERE 

Until Tommorrow...
Happy Crafting!
TTFN Jill (aka The Scrapoholic)


01 09 10