
I sure hope you enjoyed yesterdays Gift Idea!
Today is another New Project/Gift for Inspiration!
Today You are going to visit ME Again!
Yes, you'll be visiting me quite a few times this month. I don't know about you but I love making gifts for people. Everyone seems to enjoy them every year. Its something I've done since I was a kid, guess it has something to do with the fact we were poor and didn't have much money and everyone always seemed to love my gifts. This year is a very tight budget year. I'm just thankful my kids are old enough to understand it all and that Santa is flat broke and there won't be any presents from him this year :( We do lots of traditions here at my house to teach the kids the true meaning of Christmas and to enjoy the true meaning of Christmas and to cherish the time we get to spend with family, thou this year it will be just my hubby, the 3 kids and myself. We will still have a good time I'm sure.
Today, I'm going to share with you my altered clipboards. I have done several in the past and really just love making them and people find them very useful and love the designs I've made.
They are really simple, what you will need is:
Clipboard (any size)
Paper to cover it
Maybe some scraps to embellish it a little
Embellishments (if desired)
Die Cuts (if desired)
Ribbon or String
Adhesive (all sorts depending items)
Trimmer or Scissors for cutting
Acrylic square or a piece of recycled clear plastic
I think thats it
You start with your clipboard, remove plastic wrap and/or any price stickers
My Clipboards I did today are 12.5" x 9"

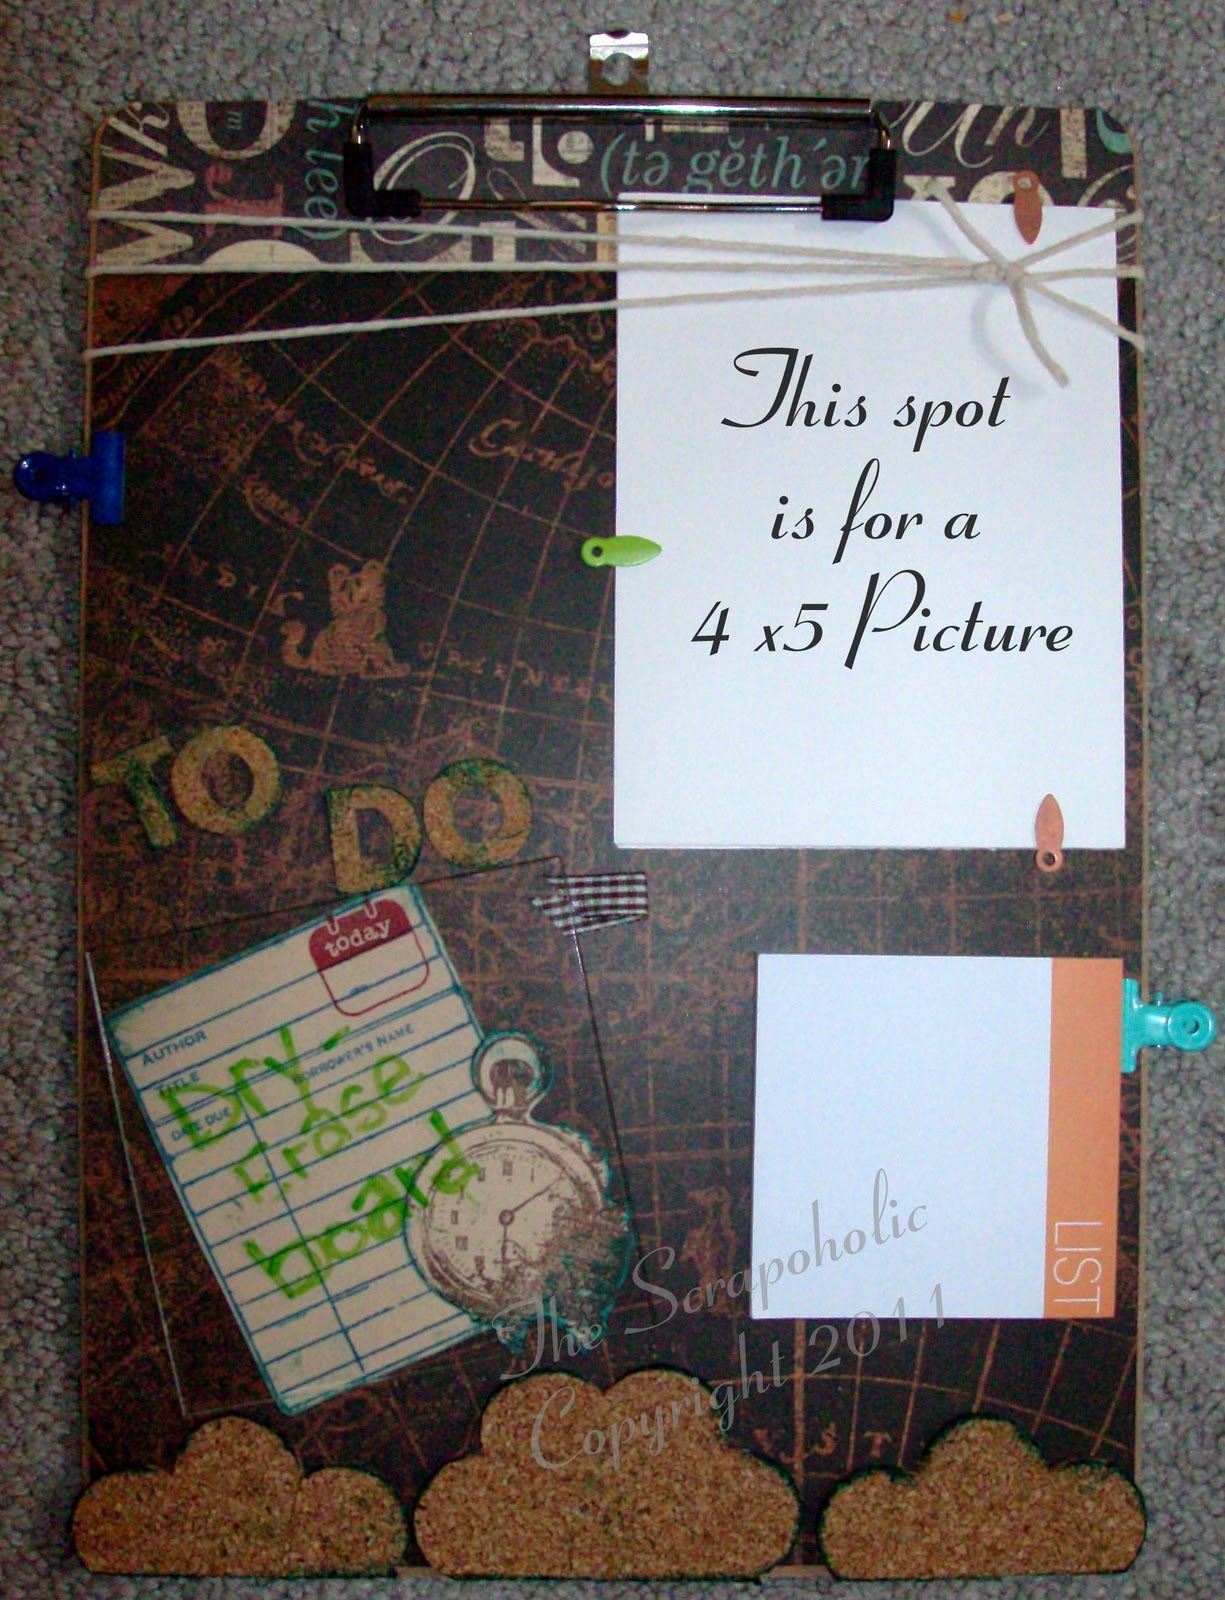
Then cut/trim your paper to size to fit. or you could choose to paint it with acrylic paint if desired too. Add any string or ribbon as desired. If you wanted to use it as a regular clipboard you could leave it just like that and be done. However, the ones I made are meant to be hung up by a computer desk or somewhere in an office or home area like a memo board

Add Embellishments to the board and adhere them down with the proper glue
 |
| You can find these fun cork board or even chalkboard shapes at Michaels and they are self adhesive and they stick pretty good! I used these on both boards as you will see in the finished clipboards |
 |
| I used a regular 4.25" x 5.5" envelop cut the flap off and adhered it down for notes. I used CTMH cork board letters which are self adhesive and can be colored with ink pads or markers. I added some ribbon to run across the bottom of the board and the top too. |
 |
| I used a Hello Kitty Die Cut to embellish it in the upper right hand corner |
 |
| To make a Dry Erase board I used a 4x4 Clear acrlic square that I got a long time ago at the Scrapbook convention. Lots of people use these to make those clear acrylic lil books. These squares also come in shapes and different sizes. there is usuaully a protective coating like you see in the picture, mine is blue and on both sides, simply peel off . |
 |
| Once you have the protective coating peeled off, which they come off super easy kin of like color forms (if you remember those), then you'll want to cover the entire back of one side with your favorite type of strong adhesive. then stick it on the clipboard where you'd like it. If you don't have these acrylic squares or shapes. You can use a flat piece of clear plastic from packaging such as a cricut cartridge or something like that, it works just as good. |
 |
| This is my finished part of the erase board. I wrote Merry Christmas with an erase board marker |
finish up with any other embellishments, like pearls, brads, ribbons, clips, die cuts, flowers, etc.
wahlaa! your done your clipboard!

What do you think? Something you might do?
If your just Joining us here is the Past Days of The Hop! It's one Blog a day for 30 Days of Gift making Ideas and projects!
Simply Click their names to go to their blogs
Day 1 ~ The Scrapoholic ~ Countdown Calendar
Day 2 ~ Jessica The Creative Stamper ~ Wreath
Day 3 ~ Debbie DD's Crafts ~ Notepad
Day 3 ~ Debbie DD's Crafts ~ Notepad
Day 4 ~ Sarah Pink Cricut ~ Scarf
Day 5 ~ The Scrapoholic ~ Alterted Paper Mache Book
Day 5 ~ The Scrapoholic ~ Alterted Paper Mache Book
Day 6 ~ Crafty Queen ~ Calendar
Day 7 ~ Playing with Paper ~ Candle
Day 8 ~ The Scrapoholic ~ Recycled Jars/Containers
Day 7 ~ Playing with Paper ~ Candle
Day 8 ~ The Scrapoholic ~ Recycled Jars/Containers
Don't Forget to check out my 30 Days of Christmas Cards too.
Also, Don't forget about contest for a chance to win my memories Digital software program
Check out the rules HERE
Until Tommorrow...
Happy Crafting!
TTFN Jill (aka The Scrapoholic)